Using an apex locator effectively involves a series of steps to ensure accurate measurements and optimal results during root canal therapy. Here's a detailed guide on how to use an apex locator:
Step-by-Step Guide to Using an Apex Locator
1. Preparation:
Ensure the patient is comfortably seated and the working area is well-lit.
Isolate the tooth using a rubber dam to maintain a dry field and prevent contamination.
2. Initial Setup:
Turn on the apex locator and ensure it is functioning properly.
Attach the lip clip (or electrode) to the patient, typically on the lip or near the
working area, to complete the electrical circuit
3. Access and Canal Preparation:
Prepare the access cavity and locate the root canal orifices.
Perform initial cleaning and shaping to remove debris and create a clear path for the endodontic file.
4. Irrigation:
Irrigate the canal with a suitable irrigant (e.g., sodium hypochlorite) to remove debris and bacteria.
Dry the canal slightly using paper points to ensure accurate readings, as excessive moisture can affect the device's accuracy.

5. Connecting the Apex Locator:
Attach the file clip (electrode) to the endodontic file you plan to use.
Introduce the file into the root canal, ensuring it is securely attached to the apex locator.
6. Apex Locator Use in Dentistry
Gradually advance the file into the canal while observing the apex locator's display.
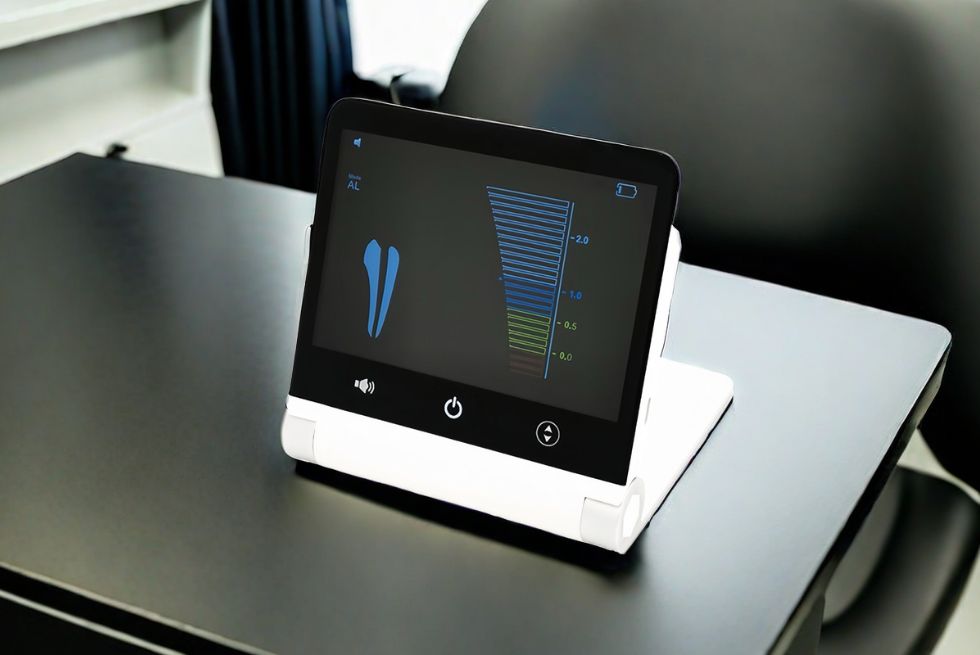
The device will provide real-time feedback, usually in the form of a digital readout, graphical representation, and/or audible signals.
Continue advancing the file until the apex locator indicates that the file has reached the apical constriction or the apex.
7. Apex Locator Readings:
Modern apex locators often display a visual representation of the file's position within the canal.
The display might show a percentage or a distance (in millimeters) to the apex.
Some devices use color codes or audible tones to indicate proximity to the apex (e.g., a steady tone or specific color when the file reaches the apex).
8. Confirming Working Length:
Once the apex locator indicates the file is at the apex, note the length by measuring from the file tip to a reference point on the tooth (e.g., the incisal edge or cusp tip).
Withdraw the file and verify the length on a ruler or measuring device.
9. Verification:
For additional accuracy, consider taking a radiograph with the file in place to confirm the working length determined by the apex locator.
Adjust the working length if necessary based on the radiographic confirmation.
10. Proceed with Treatment:
Use the established working length to continue cleaning, shaping, and obturating the canal.
Re-check the working length periodically during the procedure to ensure accuracy.
Apex Locator Tips
- Calibration: Ensure the apex locator is calibrated according to the manufacturer's instructions before use.
- Cleanliness: Keep the electrodes and file clips clean and free from debris to maintain accurate readings.
- Avoid Metal Contact: Ensure the file does not contact any metal restorations or the rubber dam clamp, as this can cause erroneous readings.
- Consistent Moisture: Maintain a consistent level of moisture in the canal. Excessive dryness or wetness can affect the accuracy.