How to Mold a Mouthguard with Boiling Water: My Simple Fitting Instructions
This article is worth reading because I will walk you through the exact steps on how to mold a mouthguard perfectly. You will learn how to mold your own mouthguard safely and effectively, ensuring you get a comfortable, custom fit that offers real protection.
Why is a Proper Mouthguard Fit So Important?
A good fit does two things. First, it ensures the mouthguard stays in place during impact. If it's floating around in your mouth, it can't absorb shock. You need the mouthguard to be snug against your teeth and gums. Second, comfort is key. If your mouthguard isn't comfortable, you won't wear it. It’s as simple as that. The goal is to make the mouthguard feel like a part of you, so you forget it's even there. Taking the time to mold a mouthguard correctly is the most important step in protecting your smile. A good mouthguard is essential for football and any other contact sport.
The difference between a generic, ill-fitting mouthguard and one you mold to your teeth is night and day. A custom fit distributes the force of an impact evenly across your teeth, which can prevent chips, cracks, and even tooth loss. It also helps protect your jaw and can reduce the risk of concussion. So, before we even get to the "how-to," I want you to understand the "why." You are not just making a piece of plastic fit. You are creating a critical piece of safety equipment. Taking 10 minutes to mold mouthguard correctly can save you a lot of pain and money down the road.
What Tools Do I Need to Mold My Mouthguard?
You don't need a science lab to do this. You can do this in your own kitchen, and it’s very simple. The beauty of the "boil and bite" mouthguard is its simplicity. Here is a short list of everything you will need to get the perfect fit. You’d better to lay everything out on the counter before starting, so as not to scramble when the water is hot. It makes the process smooth and stress-free.
Here is your checklist:
-
Your new boil and bite mouthguard.
-
A small pot of water, enough to fully submerge the mouthguard.
-
A stove or microwave to boil water.
-
A slotted spoon or tongs to safely handle the hot mouthguard.
-
A bowl of cold water.
-
A watch or a timer. Timing is very important here.
-
A mirror. This is helpful for seeing what you’re doing when you first place the mouthguard in your mouth.
That’s it. See? It's simple. Having these items ready means you can follow the fitting instructions without any interruptions. The whole process, from start to finish, should only take about 15 minutes. Getting your tools ready is the first step to success when you need to mold a mouthguard properly.
What Are the Best Mouthguard Options for Home Molding?
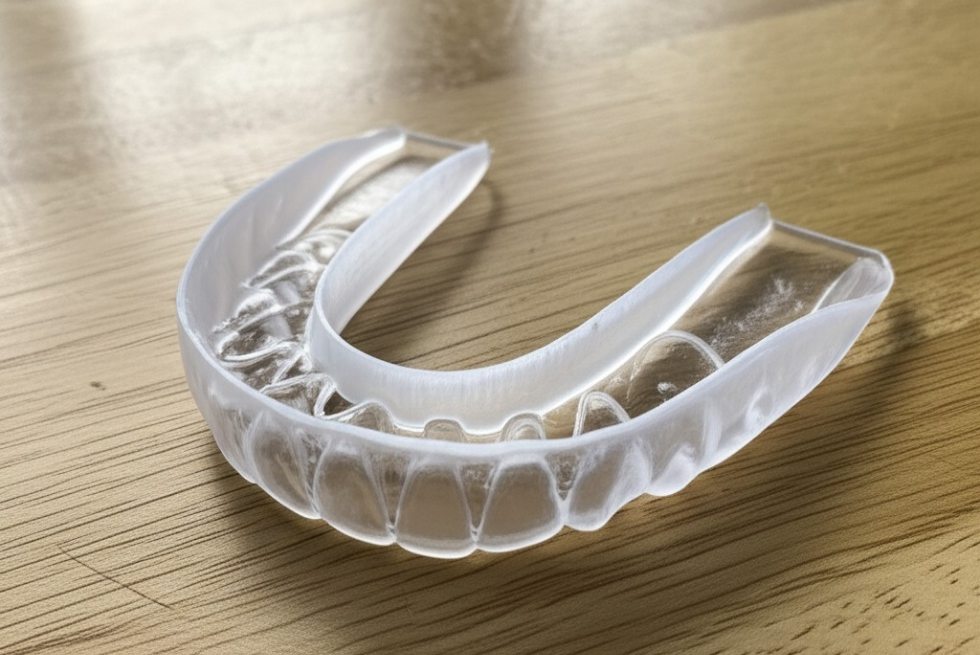
When you go to the store, you’ll see a few different mouthguard options. The one we are talking about today is called a "boil and bite" mouthguard. This is the most common and affordable type of mouthguard. It’s made from a special plastic that softens when heated. This allows you to mold it to the shape of your teeth for a semi-custom fit. It’s a fantastic option for athletes of all ages and for people who need a mouthguard for teeth grinding.
There are other types, of course. You have the basic stock mouthguards that come in a few sizes and offer no real fitting. They are often bulky and loose. On the other end, you have the custom mouthguard made by a dentist. These offer the best possible fit because they are made from an impression of your actual teeth. They are great, but they are also very expensive. You can learn more about the different types of mouthguards available and see what's best for you.
For most people, the boil and bite mouthguard is the perfect balance of protection, comfort, and cost. I’ve used them for years with great success. When you follow the steps I’m about to show you, you can get a fit that feels almost as good as a professional custom mouthguard. This is the type of mouthguard we will focus on. You can easily mold this kind of mouth guard.

How Do I Prepare to Mold My Mouthguard with Boiling Water?
Safety first. We are going to use boiling water, so we need to be careful. First, read the instructions that came with your specific mouthguard. Some brands have slightly different heating times, so it’s always good to check the instructions. The steps are general, but they work for almost every boil and bite mouthguard I’ve ever used. Always follow the instructions provided by the manufacturer.
Get your pot of water. You only need enough water to submerge your mouthguard completely. Bring the water to a boil. Once the water begins to boil and you see a rolling boil, remove the pot from the heat source. This is a key step I’ve learned over the years. Do not drop the mouthguard into the boiling water while it is still on the stove. This can cause the plastic to overheat and melt. Let the pot sit off the heat for about 30 seconds to a minute. The water will still be plenty hot to soften the material without destroying it.
This small detail makes a huge difference. Boiling the mouthguard in water that is too hot is the number one reason people fail at this process. You want the mouthguard to be soft and pliable, not a melted mess. This is the most important part of the preparation before you learn how to mold the device. Taking this extra step ensures you are ready to mold a mouthguard with boiling water safely and effectively.
What Are the First Steps to Mold the Mouthguard?
Okay, your water is hot but not on the stove. Your tools are ready. Now, it's time for the main event. Using your tongs or slotted spoon, carefully lower the mouthguard into the hot water. Do not just drop it in. Be gentle. This will be the first step to mold your mouthguard. You want to submerge the mouthguard completely.
Now, start your timer. Most mouthguard packages recommend leaving the mouthguard in the water for about 30 seconds. Again, check the instructions for your specific mouthguard, as some may need a little less or a little more time. Do not guess. Use a timer. While it’s in the water, the mouthguard will become very soft and flexible. You will see it start to look a bit limp. This is exactly what you want. This shows the mouthguard is ready to mold.
After the time is up, carefully remove the mouthguard from the water using your tongs. It will be hot, so be careful. Quickly dip the mouthguard in the cool water for just one second. This removes any excess hot water and cools the surface just enough so you don't burn your mouth, but the inside stays soft. Shake off any excess water. You need to work quickly from this point on. The mouthguard will start to harden as it cools, so you want to get it in your mouth as soon as possible.
How Do I Get a Perfect Impression of My Teeth?
This is where you create the perfect mold to your teeth. Working quickly and looking in the mirror, place the mouthguard in your mouth. Center it around your upper teeth. Use your fingers to press the front of the mouthguard against your front teeth. Don't worry about the rest of it just yet. Get it centered and pressed onto your top teeth first.
Now, bite down firmly. Don’t bite through the mouthguard, but apply firm, even pressure. This is what creates the impression of your teeth in the material. While biting, suck in strongly. Press your tongue against the roof of your mouth. This suction action helps to mold the mouthguard to the inside of your teeth and creates a snug fit. This is a critical step to get a good fitting mouthguard. You want the material to wrap around each tooth.
Hold this position for about 20 seconds. Keep biting down and sucking in. You should feel the mouthguard tighten around your teeth as it begins to take the shape of your mouth. This action creates the unique impression of your teeth. The goal is to get a deep, clear mold of your bottom teeth and suck the air out to tighten the fit around your upper teeth. This ensures the mouthguard fits securely.
How Do I Mold the Mouthguard to My Gums and Mouth?
Getting the teeth right is only half the battle. A truly comfortable mouthguard also needs to fit your gums and the roof of your mouth. While you are still biting down, use your fingers to mold the outside of the mouthguard. Press the material firmly against your gums on the outside of your teeth. Push up under your lip to ensure there are no loose areas. You want to mold it to the shape of your gums as much as possible.
Use your fingers to mold the material all the way to the back of your mouth. Make sure the mouthguard material is pressed flat against your molars. At the same time, keep pressing your tongue against the roof of your mouth. This helps to mold the inner part of the mouthguard. You want to create a channel for your teeth. This is how you get that locked-in, custom feel.
The combination of biting, sucking, and pressing with your fingers is what allows you to mold a boil and bite mouthguard so well. You are using pressure from all directions to mold it to the shape of your unique mouth structure. It may feel strange at first, but this is the best way to get a secure and comfortable fit. You need to hold the mouthguard in place with this pressure. You can easily mold the device this way.

How Do I Set the Mold and Test the Fit of the Mouthguard?
You have held the position for about 20 seconds. Now it's time to set the mold. Carefully remove the mouthguard from your mouth. Don't just yank it out. Open your mouth and gently pull it down off your teeth. You will now have a perfect impression of your teeth. To lock this shape in permanently, you need to cool it down completely.
Drop the mouthguard into your bowl of cold water. This is a very important step. The cold water will rapidly harden the plastic, setting the custom shape you just created. Leave the mouthguard in the cold water for at least a minute or two. Make sure the mouthguard is completely cool before you try it on. Using cold water to set the mold is essential.
Once it's cool, it's time to test the fit. Dry the mouthguard and place it back in your mouth. A good mouthguard fits snugly and should not fall down when you open your mouth. It should feel secure. You should be able to talk and breathe easily while using a mouthguard. If it feels good, you have successfully learned how to mold a mouthguard! If you're looking for a new one, consider checking out our selection of sports mouthguards. A good mouthguard is a key piece of gear.
What Should I Do If My Mouthguard Doesn't Fit?
Don’t panic! It happens. Sometimes, the first attempt isn’t perfect. Maybe it feels a little loose, or one spot is rubbing against your gum. The great thing about a boil and bite mouthguard is that you can usually try again. Most brands will allow you to re-boil and re-mold the mouthguard a few times. However, you should check the instructions that came with your product to be sure.
If you need to try again, just repeat the entire process. Bring your water to a boil, remove it from the heat, and submerge your mouthguard again. The hot water will soften the material, erasing the old mold. Then you can follow the fitting instructions again. This time, pay close attention to what felt wrong. If it was too loose, bite down harder and suck in stronger. If a spot was rubbing, try to press that area out more with your finger.
Each time you re-mold a mouthguard, the material can degrade a little. If you still can't get a good fit after that, it might be time to buy a new mouthguard. Maybe try a different brand or style. But in my experience, a second attempt is usually all it takes to fix any small issues and get the mouthguard to fit perfectly. You can do this. The goal is a perfect mouthguard.
Can You Mold a Mouthguard If You Wear a Brace?
Yes, you can, but it is very important to do it correctly. Fitting a mouthguard over a brace requires extra care. A standard boil and bite mouthguard can get stuck in the brackets and wires of a brace if you are not careful. This can damage your braces and the mouthguard. Many companies now make a special mouthguard designed specifically for people with braces. They are often made of a different grade of plastic and have more room.
When you mold a mouthguard with a brace, the process is similar but with one key difference. Some dentists recommend placing a strip of dental wax over your brackets before you mold the mouthguard. This prevents the soft plastic from getting locked into the brace hardware. Also, do not bite down as hard or suck in as strongly. You want a looser fit that protects your lips from the braces but doesn’t try to move your teeth. The mouthguard should just float over the brace.
Talk to your orthodontist before you try this. They can give you specific advice and may even have a preferred brand of mouthguard for their patients. Protecting your teeth is important, but protecting your expensive orthodontic work is also a top priority. For those with braces, a custom mouthguard from your dentist is often the safest and best choice. You can also explore night guards for teeth grinding if that is your primary concern. A good mouthguard is a good investment.
Key Takeaways to Remember
Here are the most important things to remember when you mold your mouthguard:
-
Read the Instructions: Always check the instructions provided with your specific mouthguard first.
-
Prepare Your Tools: Have a pot, hot water (off the heat), a bowl of cold water, tongs, and a timer ready before you start.
-
Don't Overheat: Remove the water from the heat before you submerge the mouthguard to avoid melting it. Time the process carefully.
-
Bite and Suck: Bite down firmly and suck in strongly to create a tight, custom impression of your teeth.
-
Use Your Fingers: Press the mouthguard against your teeth and gums with your fingers to ensure a snug fit all around.
-
Cool It Down: Submerge the mouthguard in a bowl of cold water for at least a minute to set the final shape.
-
Test the Fit: A good fit means the mouthguard stays on your upper teeth when you open your mouth and feels comfortable.
-
Don't Be Afraid to Remold: If it's not right, you can usually reheat and try again.