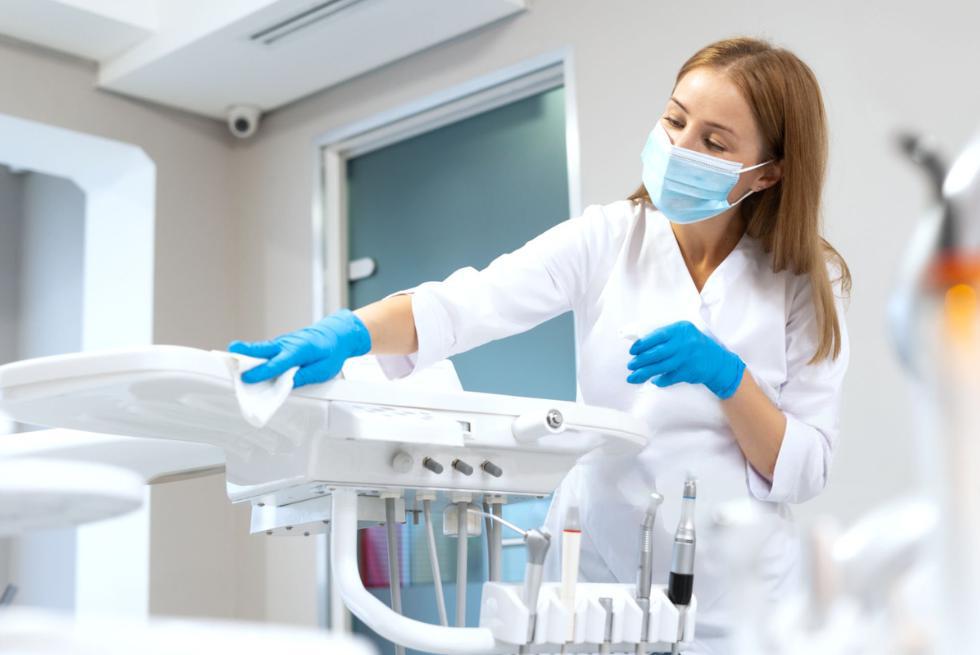
How to Disinfect Dental Clinic: A Human-Centered, Step-by-Step Guide
When patients walk into your dental clinic, they don’t see “protein loads,” “intermediate-level disinfectants,” or “Spaulding categories.” They see your chairs, your light handles, your smile — and they silently ask one question:
“Am I safe here?”
Disinfection is how you answer “yes” every single time.
This guide goes beyond listing chemicals and contact times. It connects evidence-based infection control (CDC, ADA and other major guidelines) with the real world of busy schedules, anxious patients, and tired staff.
1. What “Disinfection” Really Means (In Plain Language)
Before you choose a disinfectant wipe, it helps to translate the technical terms into something your whole team actually understands.
In a dental clinic, three levels of “making things safe” work together:
-
Cleaning – removing visible debris (blood, saliva, dust, cement) so disinfectants can actually reach the microorganisms.
-
Disinfection – using chemical agents to kill almost all disease-causing microorganisms on surfaces and non-critical items (but not necessarily spores).
-
Sterilization – using heat or specific chemicals to destroy all microorganisms, including spores, on critical and most semicritical instruments.
Internationally, instruments and equipment are grouped (Spaulding classification) into:
-
Critical – penetrate bone or soft tissue → must be heat sterilized.
-
Semicritical – contact mucosa or non-intact skin → ideally sterilized; at least high-level disinfected if heat-sensitive.
-
Noncritical – contact intact skin only → clean + low/intermediate-level surface disinfection.
Key ideas to teach your team
-
Cleaning always happens before disinfection or sterilization.
-
Not everything needs the same level of processing — wasting sterilizers on door handles isn’t smart, and using only a wipe on a surgical bur is unsafe.
-
Disinfection is a process, not just a product: right area, right product, right contact time, right technique.
2. Map the Risks in Your Clinic Before You Disinfect
Instead of asking, “What disinfectant should we buy?” start with:
“Where are the risks in our clinic?”
Walk through the clinic as if you were an infection-control inspector:
-
The operatory
-
Instrument reprocessing area
-
Dental unit waterlines and suction
-
Reception and waiting room
-
Staff areas (locker room, lunch area, office computers)
For each space, identify what is touched, by whom, and how often. Combine this with the Spaulding categories (critical / semicritical / noncritical) and surface types (clinical contact vs housekeeping).
Questions to guide your “risk map”
-
Which items enter the patient’s mouth or contact blood/saliva?
-
Which surfaces are touched with contaminated gloves (e.g., light handles, keyboards, chair controls)?
-
Which areas are “invisible” but high-risk (e.g., dental unit waterlines, suction hoses)?
-
Which places look “clean enough” but are high traffic (door handles, pens, payment terminals)?
-
Where do we see bottlenecks that tempt staff to cut corners (busy sterilization room, rushed operatory turnover)?
3. Quick Reference Table: What to Disinfect, With What, and How Often
The table below is a practical, clinic-friendly starting point. Always adapt to your local regulations, manufacturer instructions, and national guidelines.
|
Area / Item |
Spaulding / Surface Type |
What You Do (Typical) |
Disinfectant Level* |
Typical Frequency |
|
Surgical instruments, burs |
Critical |
Clean → package → steam sterilize |
Sterilization (heat) |
After each patient |
|
Mouth mirrors, impression trays |
Semicritical |
Clean → sterilize (preferred) or high-level disinfect if heat-sensitive |
Sterilization / high-level disinfectant |
After each patient |
|
Chair headrest, light handles, switches |
Noncritical, clinical contact |
Barrier + change, or clean → disinfect between patients |
Low–intermediate EPA-registered |
Between each patient |
|
Countertops in operatory |
Noncritical, clinical contact |
Clean visible soil → disinfect |
Low–intermediate EPA-registered |
Between patients / as soiled |
|
Floors, walls, baseboards |
Noncritical, housekeeping |
Routine cleaning; disinfect if visibly contaminated with blood/OPIM |
Detergent / low-level disinfectant |
Daily or per clinic policy |
|
Reception desk, door handles, pens |
Noncritical, high-touch |
Clean → disinfect |
Low-level EPA-registered |
Several times per day |
|
Dental unit waterlines |
Internal fluid pathway |
Follow waterline treatment protocol; monitor water quality |
Chemical treatment products |
Daily + periodic shocking |
|
Suction lines |
Internal fluid pathway |
Flush with approved cleaner/disinfectant |
As per manufacturer |
Between sessions / daily |
*EPA-registered hospital disinfectants with appropriate claims (e.g., tuberculocidal for intermediate level) are recommended in major guidelines for environmental surfaces.
4. Between-Patient Operatory Turnover: A Realistic Workflow
This is where many clinics either shine… or fall behind.
A well-designed turnover routine should be:
-
Fast enough not to delay your schedule
-
Simple enough for every team member to remember
-
Standardized so every operatory is turned over the same way, every time
Use a written protocol (or laminated checklist in each room) aligned with evidence-based recommendations on operatory preparation and disinfection.
A practical between-patient sequence
-
Perform hand hygiene and don appropriate PPE (heavy-duty gloves, mask, eye protection).
-
Safely dispose of single-use items and sharps.
-
Remove and discard surface barriers (chair controls, x-ray heads, keyboards, light handles).
-
Clean visible soil from clinical contact surfaces with a detergent or cleaner.
-
Disinfect these surfaces with an EPA-registered low- or intermediate-level hospital disinfectant, respecting full contact time.
-
Place new barriers on designated surfaces.
-
Restock disposables and instruments, then finish with hand hygiene again.
5. Instrument Reprocessing: More Than “Put It in the Autoclave”
Improper instrument processing is one of the biggest sources of infection-control failures found during inspections. Good news: a clear, stepwise system makes this much safer and less stressful.
A complete reprocessing cycle should include:
-
Point-of-use treatment – keep instruments moist (e.g., enzymatic spray, damp towel) so debris doesn’t dry and harden.
-
Transport – closed, puncture-resistant container to the reprocessing area.
-
Cleaning – manual scrub or ultrasonic washer/washer-disinfector, following detergent instructions.
-
Inspection & packaging – check for damage or retained debris; package in pouches or wraps with indicators.
-
Sterilization – correct cycle, load, and drying time per manufacturer instructions.
-
Monitoring & records – mechanical, chemical, and biological indicators with documented logs.
Non-negotiables in instrument disinfection/sterilization
-
Assign this work to trained personnel only — it’s never just “back room work.”
-
Never shortcut cleaning: dried blood and debris block disinfectants and sterilization steam.
-
Avoid using high-level disinfectants (e.g., glutaraldehyde) on environmental surfaces; they are for devices only and can be toxic.
-
Treat heat-sensitive semicritical items with an approved high-level disinfectant for the exact time and temperature listed on the label.
6. Environmental Surfaces: Where Hands (and Germs) Actually Go
From a patient’s point of view, the operatory looks like one big “surface.” But infection-control guidance separates surfaces into:
-
Clinical contact surfaces – frequently touched and more likely to spread microorganisms (light handles, chair controls, instrument trays, x-ray equipment, touchscreens).
-
Housekeeping surfaces – floors, walls, sinks, low-touch furniture.
Clinical contact surfaces deserve most of your disinfection attention because gloved hands, instruments, and splatter reach them repeatedly.
High-touch surfaces to always include in your routine
-
Dental chair (armrests, headrest, controls)
-
Overhead light handles and switches
-
Bracket tables, cart handles, and delivery units
-
X-ray heads, sensors, control panels
-
Keyboards, mice, touchscreens (use barriers whenever possible)
-
Drawer and cabinet pulls near the operatory
-
Reusable bib clips and curing light handles
For these surfaces, guidelines recommend barrier protection plus cleaning and low/intermediate-level disinfection between patients. If visibly contaminated with blood or other potentially infectious material, use an intermediate-level disinfectant with a tuberculocidal claim after cleaning.
7. Dental Unit Waterlines and Suction: The Hidden Biofilm Problem
The cleanest-looking operatory can still harbor risk inside its waterlines and suction hoses. Biofilm — communities of microorganisms — can colonize these systems and release microbes into the water stream.
This isn’t just theoretical: maintaining dental water quality within safe limits is now a regulatory expectation in many regions.
Practical actions for waterlines and suction
-
Use separate bottles and treatment tablets or chemical agents for unit waterlines, as recommended by the manufacturer.
-
Implement a routine of “shocking” the system at intervals to break down biofilm, plus daily maintenance dosing.
-
Flush lines per recommendations (e.g., at start of day and between patients) using potable or treated water.
-
Regularly monitor water quality if required by local rules, documenting results.
-
Run approved cleaners through high-volume and saliva ejector lines at the end of each clinical session.
8. Reception, Waiting Room, and Staff Spaces: Where Protocols Often Slip
Patients may spend more time in the waiting room than in the chair, and staff spend hours in break rooms and offices. Germs don’t care whether a space “feels clinical” or not.
Guidance on environmental infection control emphasizes that nonclinical areas still need structured cleaning and disinfection, especially high-touch surfaces.
Don’t forget to disinfect…
-
Check-in desk, pens, clipboards, payment terminals
-
Armrests and backs of waiting-room chairs
-
Door handles, light switches, elevator buttons
-
Bathroom fixtures (faucet handles, flush levers)
-
Staff room tables, shared appliances (microwaves, refrigerators)
-
Shared keyboards, phones, and headsets in admin areas
These can usually be managed with low-level EPA-registered disinfectants and a realistic schedule (e.g., at least twice daily and when visibly soiled).
9. Choosing the Right Disinfectant: Not All Wipes Are Equal
Many clinics buy disinfectants based on smell, price, or packaging. A safer approach is to match products to the tasks defined in your risk map.
CDC and other authorities highlight a few key points:
-
Use EPA-registered hospital disinfectants with clear label claims.
-
Match disinfectant level to the need:
-
Low-level (no tuberculocidal claim) for routine housekeeping surfaces.
-
Low or intermediate level for clinical contact surfaces, depending on contamination.
-
Never use high-level disinfectants (like glutaraldehyde) on environmental surfaces.
When evaluating disinfectants, look for:
-
Kill claims – Which organisms are listed? (HBV, HIV, TB, specific bacteria and viruses)
-
Contact time – Can your staff realistically keep surfaces wet that long between patients?
-
Material compatibility – Will it damage chair upholstery, plastics, or touchscreen coatings?
-
Packaging format – Wipes vs sprays; pre-mixed vs concentrates.
-
Safety – Ventilation needs, skin or respiratory irritation, odor.
The right choice is the product that your team can and will use correctly, not necessarily the one with the most claims on the label.
10. Daily, Weekly, and Occasional Disinfection Tasks
A written infection-prevention plan should spell out exactly who does what, how, and how often.
Example frequency checklist
-
Every patient
-
Turn over operatory: barriers, cleaning, and surface disinfection
-
Process instruments through the entire reprocessing cycle
-
Daily
-
Disinfect high-touch surfaces in reception and staff areas
-
Clean and disinfect housekeeping surfaces that are visibly soiled
-
Treat suction lines according to product instructions
-
Weekly (or per manufacturer)
-
Perform waterline “shock” if required
-
Inspect and deep-clean rarely moved equipment (bases of carts, behind units)
-
Monthly / Quarterly
-
Audit compliance using a checklist (internal or CDC-based)
-
Review logs of sterilization, biological indicator tests, and equipment maintenance
-
Refresh team training or micro-learning sessions on hot spots and near misses
11. Common Disinfection Mistakes (And How to Fix Them)
Most infection-control problems in dental settings don’t come from exotic pathogens — they come from ordinary shortcuts.
Watch out for these pitfalls
-
Spray-and-wipe-immediately – not respecting the disinfectant’s full contact time.
-
Using one wipe for the entire operatory – once it’s visibly soiled, it’s spreading contamination.
-
Ignoring “clean-looking” equipment like curing lights, intraoral cameras, and x-ray controls.
-
No written protocol – relying on “how we’ve always done it” instead of evidence-based guidelines.
-
Overusing harsh chemicals on delicate surfaces, leading to cracked plastics and damaged upholstery.
-
Storing sterile packages in dusty or cluttered areas, or opening them long before use.
Turning these into training topics and checklist items helps staff catch errors before inspectors — or infections — do.
12. Make Disinfection Visible to Patients
From a marketing and trust-building perspective, a well-disinfected clinic should not be invisible.
When patients see your disinfection culture, they feel safer and are more likely to recommend you.
Ways to make your safety culture tangible
-
Turn over the operatory with the door slightly open so patients glimpse the process (without compromising privacy).
-
Display a simple, patient-friendly poster: “How We Keep This Clinic Safe for You”.
-
Train your front desk team to confidently answer questions like, “How do you clean the instruments?” in non-technical language.
-
Include a short “Our infection-control promise” section on your website and new-patient forms.
13. Bringing It All Together
To truly disinfect a dental clinic, you’re not just fighting germs. You’re:
-
Designing clear systems that staff can follow on a busy Monday.
-
Matching the right level of decontamination to the right item.
-
Choosing disinfectants that are effective, safe, and realistic for your workflow.
-
Making cleanliness and safety visible to your patients.
If you treat disinfection as “something that happens in the background,” it will always feel like extra work. If you treat it as part of the clinical experience and your brand, it becomes an everyday habit — just like hand hygiene or charting.
You don’t need the biggest sterilization room or the most expensive wipes to surpass your competitors. You need consistent, documented, human-centered disinfection routines that protect both your patients and your team, every single day.

