The Complete Introduction to Intraoral Scanning
Switching from trays and PVS to a wand and a screen doesn’t just change how you take impressions – it changes how your whole practice feels.
Intraoral scanners have moved from “nice-to-have gadget” to “central hub” for diagnostics, communication, planning, and even production. This guide walks you through that shift in plain language, so you can see what going digital really means for you, your team, and your patients.
-
What you’ll find in this guide:
-
What an intraoral scanner actually is (beyond the marketing)
-
How scanning works, step by step
-
Where the real cost and time savings come from
-
How it affects patient comfort and case acceptance
-
Where digital impressions shine – and where analog may still be better
-
How “open vs. closed” systems and file formats affect your freedom
-
How to compare scanners and plan your own rollout
-
A simple way to think about scanner ROI
1. Why intraoral scanning is reshaping everyday dentistry
For decades, impressions have been one of the most stressful parts of a dental visit: trays, taste, mess, and then… hoping the impression actually poured well at the lab. Digital impressions replace that with a fast, visual, repeatable process that patients can literally see on the screen.
Today’s intraoral scanners also plug into CAD/CAM systems so you can design and manufacture crowns, splints, aligners and other restorations with the help of software instead of wax and stone. Organizations like FDI World Dental Federation describe CAD/CAM dentistry as using digital data to design and fabricate custom devices in a more standardized, predictable way – and intraoral scanning is the front door to that world.
-
At a high level, intraoral scanning is being driven by:
-
Patient experience – a cleaner, more modern impression process.
-
Clinical efficiency – faster workflows and fewer remakes.
-
Business growth – new treatments, in-house workflows, and stronger lab partnerships.
2. What is an intraoral scanner?
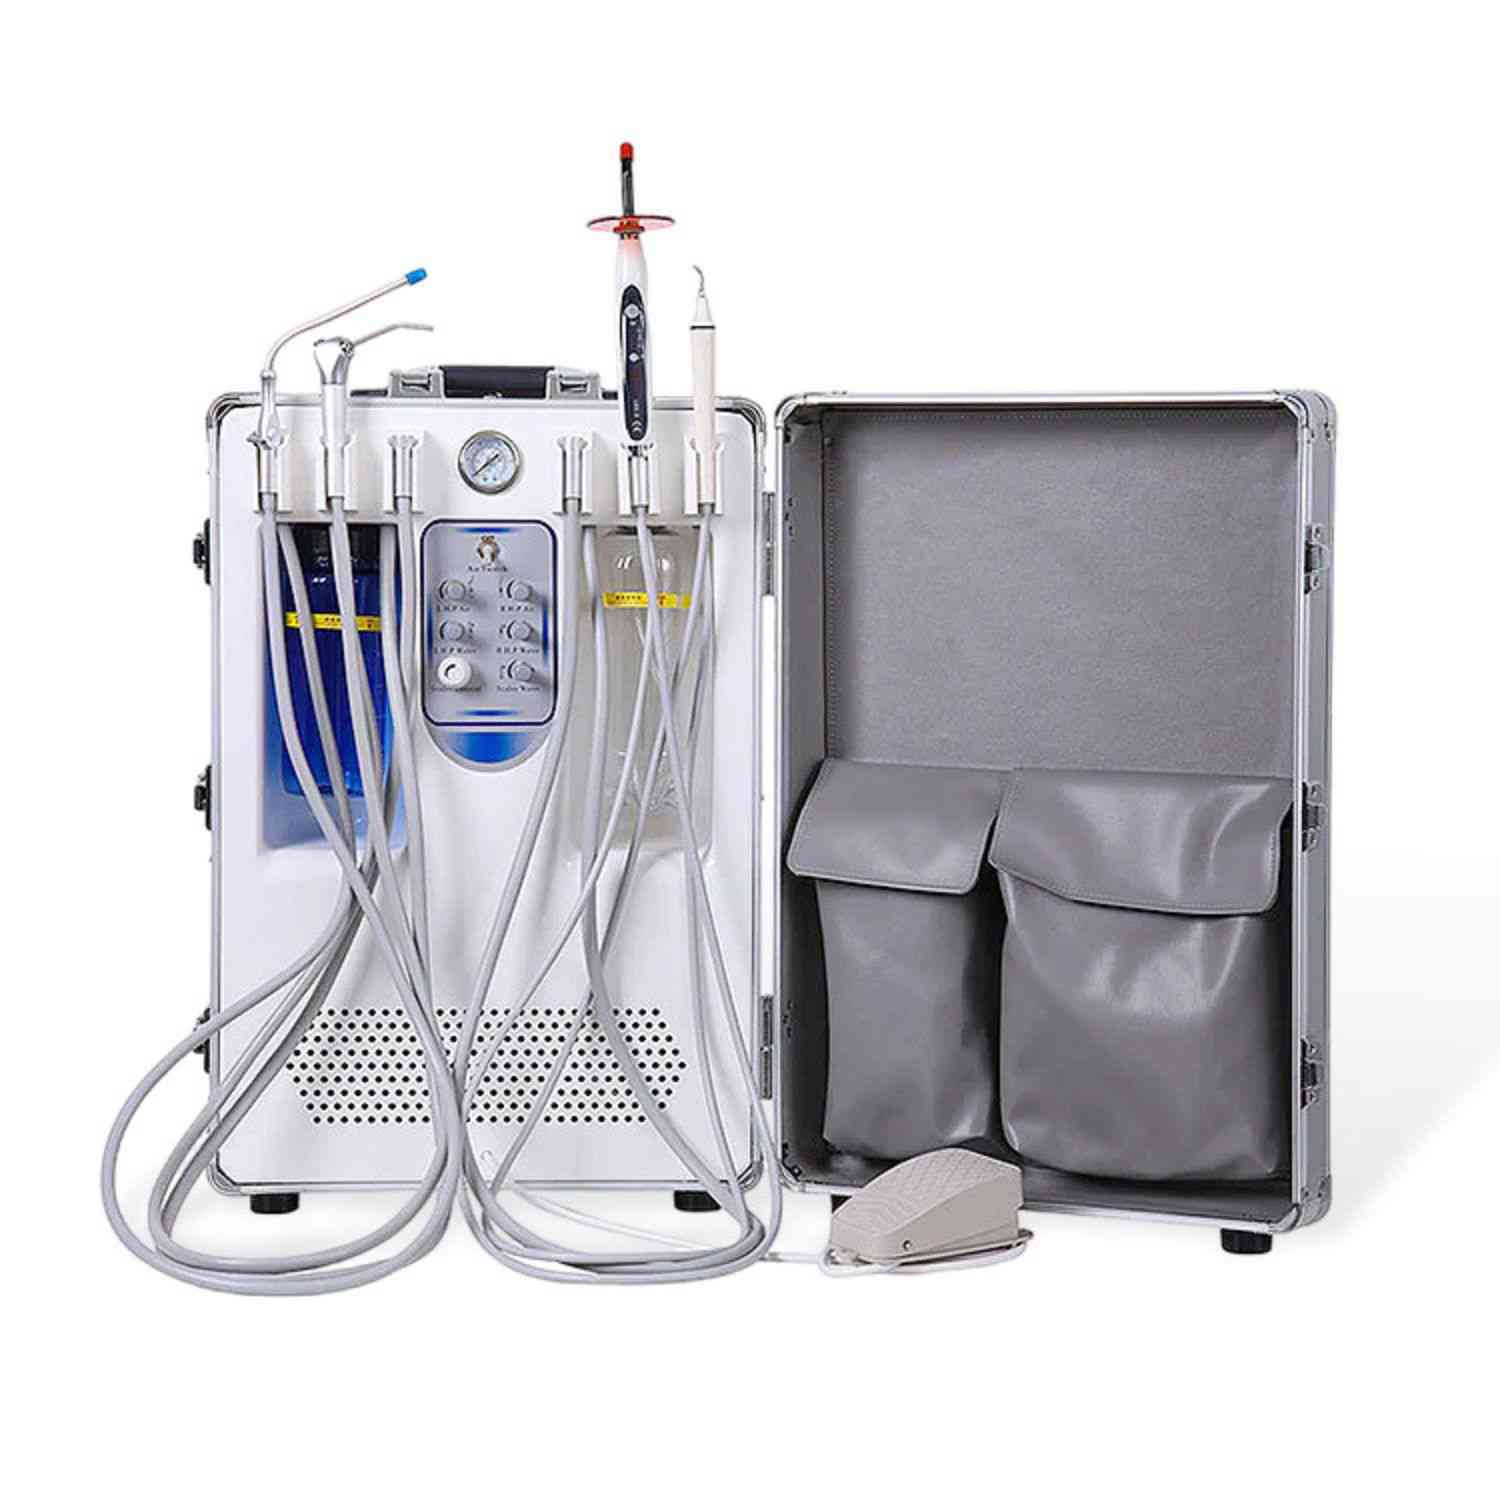
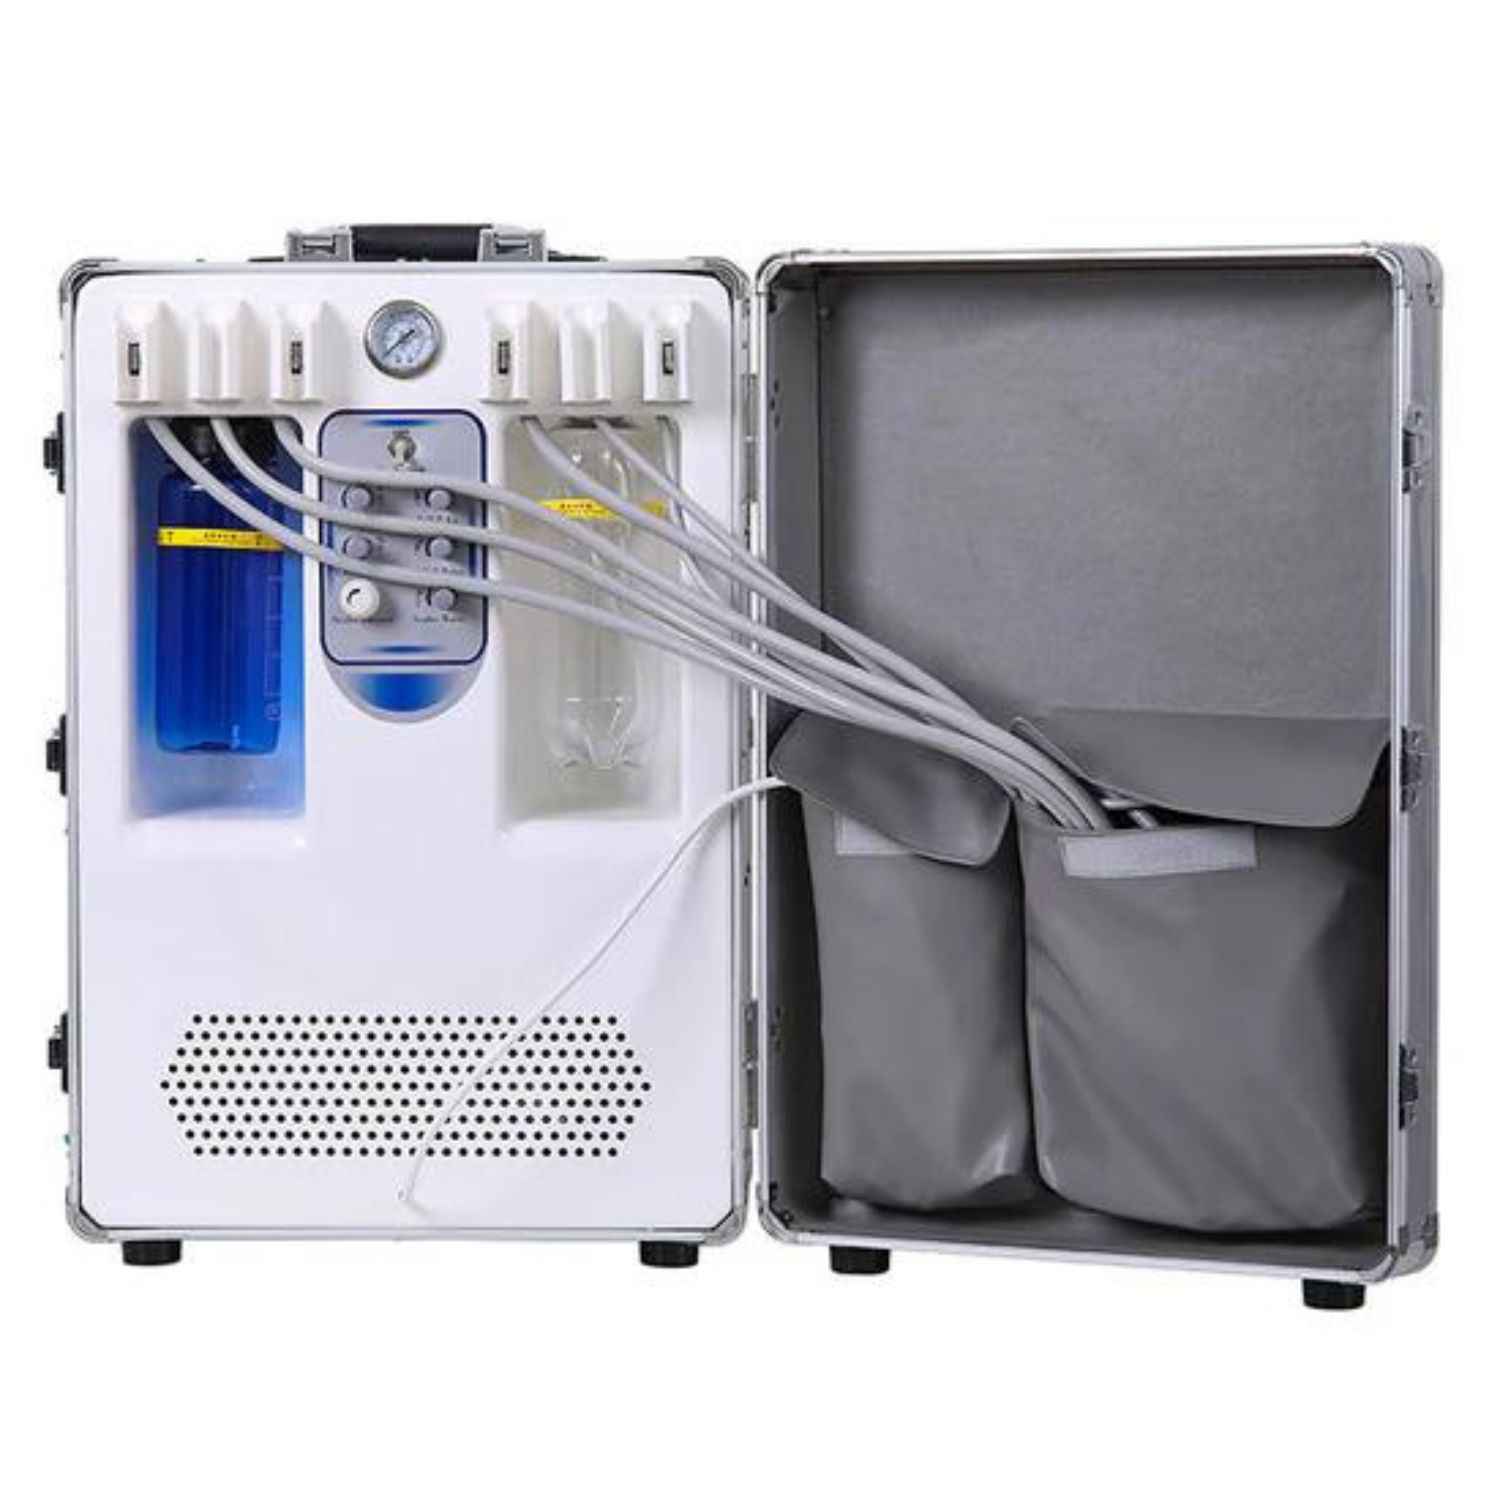
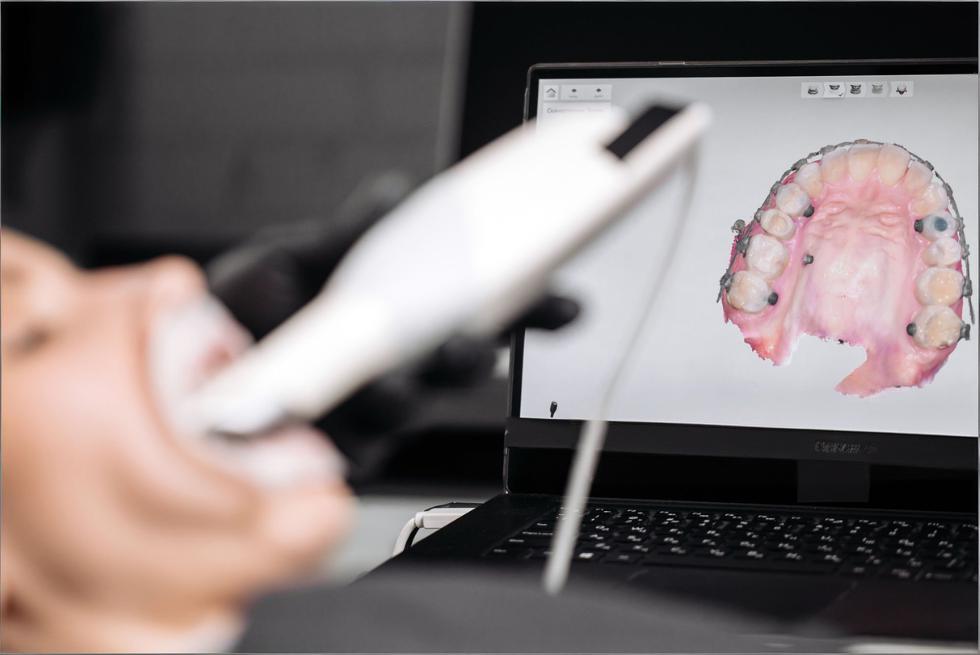
An intraoral scanner is a handheld device that captures a 3D digital model of a patient’s teeth and soft tissues. Instead of filling a tray with impression material, you guide the scanner around the mouth while it records thousands of images per second, stitching them together into a color, 3D “digital cast.”
Modern scanners are typically composed of: a scanning handpiece, optics and light source, onboard processing, and software that runs on a cart, laptop, or mini-PC. Some systems are wired; others are fully wireless with battery-powered handpieces.
-
A scanner can capture much more than just “shape”:
-
Tooth and gingiva geometry (for restorations, aligners, splints)
-
Occlusion (static bite and sometimes dynamic movement)
-
Color and shade data for improved aesthetics
-
Soft tissue detail around margins and emergence profiles
-
Longitudinal changes when you compare scans over time (wear, recession, movement)
3. How an intraoral scanner works
Under the hood, intraoral scanners use technologies like structured light, confocal imaging, or video-based acquisition. The scanner projects a light pattern onto teeth and tissues; sensors record how that pattern deforms, and software converts that information into a 3D point cloud and then into a surface mesh.
Increasingly, AI-driven algorithms clean up noise, auto-trim unwanted areas, detect margins, and even flag areas of concern such as wear, plaque or demineralization in some systems when paired with diagnostic software.
-
A typical scan workflow looks like this:
-
Prepare – isolate as needed, manage moisture, and choose your scan strategy.
-
Acquire – move the scanner in a guided path (e.g., occlusal → lingual → buccal).
-
Process – software aligns frames, removes artifacts, and fills small gaps.
-
Check – inspect contacts, margins, and overall coverage on the screen.
-
Export / send – send the scan to a lab or into your own CAD software as STL, PLY, or proprietary formats.
At this point in a live article, a short (20–30 second) embedded video of the scan process can be very effective to show patients and team members how simple the workflow feels in real time.

4. The business case: what are the cost savings of intraoral scanning?
The biggest financial benefits of an intraoral scanner rarely show up as a single big number. Instead, they come from small savings multiplied across every impression you take: materials, shipping, chairtime, and fewer remakes. Over a few years, that adds up to a meaningful difference in profitability.
-
Think of cost savings in three buckets:
-
Direct costs – impression material, trays, shipping, poured models, storage.
-
Time costs – chairtime, assistant time, and lab turnaround.
-
Quality costs – remakes, adjustments, and lost productivity from failures.
4.1 Impression material and shipping
When you move to digital impressions, physical impression costs drop dramatically. PVS, alginate, adhesive, trays, disinfectants, plaster, and model storage all shrink or disappear. Instead of boxes of models, you store your scans securely in the cloud or on a local server.
For orthodontists and prosthodontists, replacing shelves of stone casts with searchable digital libraries frees up space and makes it easier to revisit old cases or set up long-term monitoring programs.
-
Typical areas where digital impressions reduce expenses:
-
Impression material and trays (often tens of dollars per case)
-
Disinfection, packaging, and shipping to the lab
-
Model fabrication and storage over years
-
Staff time spent on pouring, trimming, labeling, and archiving models
4.2 Time savings
When digital impressions become routine, the impression phase shrinks dramatically. There’s no mixing, loading, or waiting for material to set; and if a detail is missing, you can rescan just that area immediately instead of recalling the patient.
Many practices find that this doesn’t just shorten procedures – it makes scheduling more predictable and opens space for more treatment in the same number of hours.
-
Where you tend to see the biggest time wins:
-
Impression phase – no mixing, loading, or setting time.
-
Problem-solving – deficiencies are visible immediately instead of a week later at the lab.
-
Lab communication – digital prescriptions, real-time messaging, and standardized data.
-
Follow-ups – easier to compare “before and after” or track changes over time.
4.3 Disposable tips and everyday efficiency
Disposable scanner tips offered by many leading brands are designed to make scanning faster to start and simpler to manage day-to-day. Instead of scheduling tip sterilization and tracking inventory of autoclaved tips, staff simply open a sterile, single-use tip, scan, and discard.
That convenience is especially helpful in busy clinics, multi-chair environments, or practices with large hygiene teams where scanners are constantly in use.
-
Practical pros and cons of single-use tips:
-
Pros
-
Minimal turnaround time between patients
-
Reduced risk of tip damage in the autoclave
-
Lower cross-contamination risk when protocols are followed
-
Considerations
-
Ongoing consumable cost that must be factored into ROI
-
Environmental impact vs. reusable tips (important for sustainability-minded practices)
4.4 Faster, cleaner workflows
Once scan data is captured, you can send it to the lab or feed it straight into CAD software for same-day restorations, splints, wax-ups, and prototypes. For appropriate indications, single-visit crowns or onlays become realistic options instead of aspirational marketing.
With digital workflows, many clinicians find they retain the same clinical quality while cutting appointment chains in half: for example, prep and final cementation in one well-planned visit rather than a temp plus follow-up.
-
A typical “fast-track” digital workflow might look like:
-
Patient arrives with fractured crown → scan existing situation.
-
Prep tooth and rescan → design restoration in CAD software.
-
Mill or print provisional/final restoration in-house, or send digital file to lab.
-
Seat and adjust using the digital occlusion as a reference.
A side-by-side comparison image of a traditional impression tray and a digital 3D model fits naturally here and visually reinforces the contrast between the two workflows.
5. How will intraoral scanning affect my patients?
From the patient’s point of view, the biggest change is emotional: the impression appointment shifts from “something unpleasant I have to survive” to “something interesting I get to see.”
Many patients describe digital impressions as more comfortable, easier to tolerate, and more engaging. They see their own teeth, in color, on a screen. That visual element alone can transform how they perceive the visit and your technology level.
-
Groups that tend to benefit the most:
-
Gag-prone patients or those with strong aversions to impression material
-
Children and adolescents, who often respond well to interactive visuals
-
Medically complex or anxious patients, where shorter, more predictable appointments matter
-
Long-term restorative or orthodontic cases, where multiple impressions would normally be required
5.1 Improving patient comfort
Instead of feeling trapped under a loaded tray, patients see a small camera moving around their mouth while a 3D model grows on screen. There’s no taste, minimal bulk, and usually fewer moments where patients have to “just breathe through your nose” while everyone watches the clock.
That doesn’t mean every scan is perfect every time – you still need good retraction, moisture control, and technique – but the sensation is fundamentally different and generally perceived as less stressful and more tolerable.
-
Small chairside habits that further improve comfort:
-
Narrate what you’re doing (“I’m just scanning the back teeth now.”).
-
Show progress on the screen so patients feel involved.
-
Build in micro-breaks for patients with limited opening or jaw issues.
-
Use supportive positioning and cushions, especially for longer scans.
5.2 Exciting patients and improving treatment acceptance
A static 2D X-ray or old impression tray is a tough communication tool. A rotatable 3D model of the patient’s own mouth is something completely different. You can zoom in on wear facets, fractures, or crowding and let patients explore with you.
When patients see their problems and potential outcomes, case acceptance typically rises. Digital systems also integrate with smile design, monitoring, and simulation apps, so you can demonstrate how teeth might move, how wear might progress, or what a new smile could look like – without committing to treatment yet.
-
Practical ways to use scans as a “storytelling” tool:
-
Rotate the model to show cracks or large restorations that need attention.
-
Overlay historic scans to highlight changes over time.
-
Use color-mapping for wear or plaque where available.
-
Take screenshots and send them via secure patient portals for later review at home.
5.3 Redefining patient communication
Digital impressions turn your scanner into a communication hub, not just a clinical tool. Patients can receive scan previews, annotated images, or even full 3D visualizations through secure apps or web portals, depending on your system.
This helps shift the relationship from “dentist telling patient what to do” to “team making decisions together.” Many patients appreciate being able to revisit visual explanations later, share them with family, or refer to them when making financial decisions.
-
To make the most of this new communication style:
-
Do: Use simple, non-technical language and clear visuals.
-
Do: Invite questions and co-create treatment plans.
-
Don’t: Overwhelm patients with too much technical data on a single visit.
-
Don’t: Assume that a great scan automatically means a patient understands – keep checking in.
6. Growing your clinical offering with digital dentistry
An intraoral scanner is often the first step into a wider digital ecosystem. Once scanning becomes routine, most practices start to expand what they use the data for.
You might start with basic crown and bridge, then add occlusal splints, implant workflows, aligner cases, mock-ups, and long-term monitoring. Because digital data is so flexible, you can plug into multiple labs, design services, and in-house equipment over time.
-
Common “growth paths” after adopting scanning:
-
Fixed prosthodontics – crowns, onlays, veneers, bridges
-
Invisible aligners – via labs, open aligner workflows, or planning services
-
Implant workflows – guided surgery, custom abutments, immediate provisionals
-
Splints and nightguards – digitally designed and milled/printed
-
Wear and recession monitoring – comparing scans year over year
6.1 See what in-house dentistry can do for your practice
Combining an intraoral scanner with a chairside mill or 3D printer unlocks same-day and next-day solutions that are hard to achieve with analog workflows. It won’t replace your lab for everything, but it can be transformative for common, well-defined indications.
You get tighter control over timelines, fewer provisionals, and more flexibility when patients need something urgently. Labs benefit too: they receive higher-quality digital data for complex work, and you can collaborate earlier in the case.
-
Great candidates for in-house workflows:
-
Single posterior crowns and onlays
-
Simple anterior restorations (after training and case selection)
-
Occlusal splints and nightguards
-
Provisional restorations for larger cases, even if finals are lab-made
7. Clinical quality: how accurate are digital impressions?
“Is it accurate enough?” is usually the first clinical question. The short answer: for many common indications, yes – but technique and case selection still matter.
High-quality intraoral scanners can deliver accuracy comparable to conventional impressions for short spans (for example, single crowns and small bridges). For longer full-arch or complex removable cases, conventional impressions may still be recommended or at least used as a benchmark, depending on your scanner and workflow.
-
Two key concepts:
-
Trueness – how close your scan is to the “real” geometry.
-
Precision – how consistent repeated scans are with each other.
7.1 Digital scans versus analog impressions
Digital scanning removes some of the biggest analog error sources: material shrinkage, tray distortion, poor mixing, and stone expansion. Instead, accuracy depends on the scanner hardware, software algorithms, scan path, and the operator’s technique.
Analog impressions still perform very well for certain full-arch and removable scenarios, especially where large soft-tissue areas are involved and scanner stitching errors can accumulate. Many practices use a blended approach, choosing digital or analog based on indication, patient, and their own experience.
-
Main error sources in each workflow:
-
Analog
-
Tray flexing or improper tray selection
-
Voids, pulls, and bubbles in impression material
-
Dimensional changes in impression or stone
-
Digital
-
Incomplete coverage (missed margins, palatal areas, distal surfaces)
-
Saliva or blood obscuring details
-
Stitching errors from erratic scan paths
-
Movement of soft tissues during scanning
7.2 Real-world limitations and clinical challenges
No technology is perfect. Digital impressions have their own set of challenges, and acknowledging them honestly is one of the best ways to choose and use a scanner wisely.
Some of the most common “hard cases” include:
-
Edentulous or near-edentulous arches Without many hard landmarks, scanners have a harder time stitching images accurately. The compressibility of mucosa can also introduce distortion.
-
Practical tip: Consider a hybrid approach (scan plus conventional impression) or use scan bodies and markers to improve reference points.
-
Large areas of shiny metal Full-coverage metal restorations and large metal frameworks can cause reflection and data dropout.
-
Practical tip: Adjust angulation, use recommended scanning strategies, and follow your manufacturer’s guidance on handling highly reflective surfaces.
-
Deep subgingival margins If the margin is hidden by tissue or blood, it’s hidden from your scanner too.
-
Practical tip: Proper tissue management and retraction are just as critical as with conventional impressions; digital workflows don’t remove the need for good periodontium management.
-
Patient-related factors Limited opening, reduced cooperation, and excessive movement can all make scanning more challenging.
-
Practical tip: Break the scan into shorter segments, schedule extra time for complex patients, and practice specific scan paths for difficult quadrants.
Being clear about where digital shines – and where you might still rely on analog impressions or a combined workflow – builds trust with both your team and your patients.

8. Investment and ROI: how much does an intraoral scanner cost?
The purchase price of an intraoral scanner is only part of the story. You’ll also want to consider software subscriptions, service plans, training, consumables (tips, sleeves), and potential costs or savings related to lab fees.
Different vendors position their solutions at various price points, from entry-level scanners designed primarily for “scan and send” workflows to premium systems with advanced diagnostic and AI features. Lifecycle costs over 5–7 years are more meaningful than the sticker price alone.
-
When evaluating cost, look beyond the box:
-
Hardware price and expected lifespan
-
Software and update fees (annual or monthly)
-
Support, training, and warranty coverage
-
Consumables (tips, batteries, sleeves)
-
Expected lab fee discounts and reduced remakes
-
New revenue from added services (e.g., aligners, splints, same-day crowns)
8.1 The price of an intraoral scanner: example ROI
Here’s a simplified example just to illustrate how savings can accumulate over time. The numbers will vary in your situation, but the structure is useful when you run your own calculations.
Assumptions (for illustration only, not a quote):
-
Average analog impression + bite registration cost (materials, trays, disinfection, shipping): $40 per case
-
Digital lab discount or savings per case: $20 (thanks to lower lab costs and no shipping)
-
All cases are suitable for digital workflows
|
Crowns per month |
Discount per digital case |
Monthly savings |
Yearly savings |
5-year savings |
|
20 |
$20 |
$400 |
$4,800 |
$24,000 |
|
40 |
$20 |
$800 |
$9,600 |
$48,000 |
|
60 |
$20 |
$1,200 |
$14,400 |
$72,000 |
In this basic scenario, even a mid-range scanner could pay for itself in a few years through lab and material savings alone – before counting time savings, extra appointments you can book, or new treatments you can offer.
-
Helpful questions to ask when thinking about ROI:
-
How many fixed restorative cases do I start each month?
-
How many impressions are remade per year due to errors?
-
What lab discount (if any) is offered for digital cases?
-
What new treatments (aligners, splints, in-house work) would I realistically adopt in the next 2–3 years?
9. Is intraoral scanning easy?
There is a learning curve – but most clinicians and team members who are comfortable with smartphones and basic software adapt surprisingly quickly. Vendors provide scan strategies, online training, and in-person courses; once you’ve done a few dozen cases, scanning tends to feel natural.
Many practices find that assistants and hygienists become scanning champions, taking on most of the acquisition work while doctors focus on diagnosis and planning.
-
What the learning curve usually feels like:
-
First 10 scans: You’re thinking about every movement; scan paths feel slow and clumsy.
-
Scans 10–50: Speed improves, fewer rescans, and your own “best practices” emerge.
-
After 50+ scans: Scanning becomes routine; the scanner feels like another handpiece.
9.1 Practical how-to guides & a 30-day onboarding roadmap
Rather than trying to master every indication on day one, a phased approach works best. Most scanner manufacturers provide how-to videos and step-by-step guides for crowns, bridges, implants, aligners, and more – use them.
-
A simple 30-day onboarding plan:
-
Week 1 – Familiarization: Scan staff members or study models; get comfortable with basic movement and software tools.
-
Week 2 – Single-unit cases: Start with straightforward posterior crowns, scanning both digital and analog for safety if needed.
-
Week 3 – More complexity: Add anterior cases, small bridges, or splints; build feedback loops with your lab.
-
Week 4 – Refine workflows: Standardize scan strategies, delegate scanning to trained team members, and review outcomes together.
10. Comparing intraoral scanners: a practical checklist
With more brands and models entering the market, choosing a system can feel overwhelming. Independent comparisons – including reviews from organizations like Institute of Digital Dentistry – highlight that there’s no single “perfect” scanner; the right choice depends on your priorities and workflows.
Rather than chasing specs alone, focus on how the scanner will fit into your practice over the next 5–7 years.
-
Key criteria to evaluate when you demo scanners:
-
Scanning speed and fluidity – how natural does it feel chairside?
-
Ergonomics and weight – especially for smaller hands or long scanning sessions.
-
Tip design and heating – access to distal areas, fogging control, and tip size.
-
Open vs. closed architecture – can you export standard files to any lab or only to certain partners?
-
Subscription model – what’s included (updates, support, AI features) and at what cost?
-
Diagnostic and AI tools – integrated caries, wear, or monitoring modules.
-
Integration options – compatibility with your existing PMS, CBCT, mills, or printers.
-
Training and support – local reps, online academies, and community resources.
10.1 Open vs. closed systems & file formats
One of the most important – and often overlooked – questions is: “What happens to my data?”
In practical terms, this comes down to two things:
-
What file formats can I export?
-
Can I use those files with any lab or software I choose?
Common 3D file formats include:
|
Format |
Includes color? |
Typical use case |
|
STL |
No |
Universally accepted geometry |
|
PLY |
Yes |
Color scans, visualization, documentation |
|
OBJ |
Yes (with MTL) |
Some CAD/CAM and visualization workflows |
-
Open systems generally allow you to export standard formats (like STL, PLY) and send them to any lab or design software that accepts them.
-
Closed systems may keep you inside a specific ecosystem: you get tight integration and convenience, but less freedom to change labs or software later.
When you’re comparing scanners, ask:
-
Can I export STL and/or PLY files without extra fees?
-
Are there any restrictions on which labs I can work with?
-
If I switch labs or add new software in 3–5 years, will my current data still be usable?
In other words: your scanner isn’t just a device – it’s a way of creating long-term digital assets. You want to make sure those assets remain useful, even if your vendors change.
11. Implementation roadmap: from first scan to fully digital
Going digital doesn’t have to be all-or-nothing. A staged rollout reduces stress on your team and lets you refine protocols as you go.
Start with one or two indications, get predictable results, then expand. By the time you’re fully digital for impressions, scanning will feel like the most natural option.
-
A four-phase implementation map:
-
Phase 1 – Pilot: One scanner, one indication (e.g., single crowns), one primary lab partner.
-
Phase 2 – Expansion: Add bridges, splints, and diagnostic scans; more staff members scan.
-
Phase 3 – Ecosystem: Integrate with CBCT, design software, or in-house production as appropriate.
-
Phase 4 – Optimization: Use analytics (where available) to track scan times, remakes, and utilization; fine-tune protocols accordingly.
12. Data, security & compliance considerations
When your impressions become digital files, they’re no longer just “models” – they’re protected health information (PHI). That means you need to think about data security, privacy regulations, and backup strategies.
Most major scanner vendors build encryption, user access controls, and secure cloud synchronization into their platforms, but responsibility for configuration and workflow still lies with your practice.
-
Questions to ask vendors and your IT partner:
-
Where is patient data stored (locally, in the cloud, or both)?
-
How is data encrypted at rest and in transit?
-
How are user roles and access controls managed?
-
What backup and disaster recovery options are available?
-
How does the system support compliance with local privacy regulations?
13. About Andrew Singer
Andrew Singer is a dentistry and medical-technology writer who has spent years translating complex digital concepts into clear, everyday language for clinicians. His work focuses on demystifying digital workflows so that dentists, specialists, and lab technicians can feel confident taking their first steps into scanning, CAD/CAM, and AI-assisted diagnostics.
-
In his writing, Andrew tends to:
-
Highlight real-world clinician experiences rather than just product specs.
-
Connect digital tools to tangible benefits for patients and teams.
-
Emphasize that going digital is a journey, not an overnight switch.
14. FAQ: why some scanners gather dust (and how to avoid it)
Even excellent scanners sometimes end up under-used. Understanding why that happens can help you avoid the same pitfalls.
-
“We bought a scanner, but the team never really used it.” Often this comes down to training and ownership. If no one is clearly responsible for scanning – and there’s no simple protocol – old habits win.
-
Solution: Appoint a “scan champion” (or two) and give them time and training to lead the change.
-
“The software fees and updates were more than we expected.” Subscription models can surprise practices that only looked at the hardware price.
-
Solution: When comparing scanners, include 5–7 years of software and service costs in your ROI calculation.
-
“Our network / hardware isn’t fast enough, so scanning feels slow.” High-quality 3D data can be demanding on older computers and networks.
-
Solution: Check minimum specifications and, if needed, budget for a modest IT upgrade alongside the scanner.
-
“Our lab wasn’t ready for digital, so it felt like more work, not less.” If your lab can’t fully support digital workflows, early experiences can be frustrating.
-
Solution: Involve your lab(s) early. Ask which scanners and file formats they prefer, and what they need from you.
Treat these not as warnings against scanning, but as a checklist to make sure your investment actually gets used – and used well.
15. Want to learn more?
If you’re considering your first scanner – or thinking about upgrading – the next best step is usually seeing one in action on real cases similar to yours. Combine that with a frank discussion about costs, support, and training, and you’ll quickly see which systems feel like a fit.
-
Ways to deepen your understanding:
-
Attend a hands-on course or local study club focused on digital workflows.
-
Ask your lab which scanners and file formats they work best with.
-
Shadow a colleague who’s a few years ahead in their digital journey.
-
Explore vendor academies, webinars, and independent reviews to compare options.
16. Read also
If you’d like to keep building your digital dentistry knowledge, these topics naturally follow an introduction to intraoral scanning:
-
Suggested follow-up reading topics:
-
Digital vs. analog impressions in infection-control–focused practices – how digital workflows can support modern infection-control protocols.
-
How digital dental monitoring works – using scans to track orthodontic and restorative cases remotely.
-
Pricing and choosing the best intraoral scanner for your practice – a deeper dive into contracts, bundles, and negotiation strategies.
17. Stay ahead in digital dentistry
Digital dentistry isn’t a fad; it’s a gradual but permanent shift in how we diagnose, plan, and deliver care. Intraoral scanning is often the gateway – and once you and your patients experience it, it’s hard to imagine going back to trays and stone.
-
Habits that keep your practice on the leading edge:
-
Regularly review your digital workflows and look for bottlenecks.
-
Invest in ongoing training for your team, not just initial onboarding.
-
Involve patients by using scan data as a visual education tool.
-
Maintain close collaboration with your labs and tech partners so you grow together.
If you approach intraoral scanning not just as a piece of hardware, but as a new way of working with patients, labs, and your team, it becomes much more than “taking impressions digitally” – it becomes the backbone of a modern, human-centered dental practice.